
A pergola can turn a cramped patio or underused garden corner into the most inviting spot in your yard, even when square footage is at a premium. Small doesn’t mean sacrificing style or function. With smart design choices, the right materials, and a bit of vertical thinking, a compact pergola adds shade, structure, and a natural framework for plants and lighting. Whether you’re working with a narrow side yard, a postage-stamp patio, or a tight corner by the fence, these ideas will help you maximize impact without overwhelming your space.
Table of Contents
ToggleKey Takeaways
- Small garden pergola ideas maximize vertical interest without consuming ground space, making them perfect for tight patios, narrow side yards, and corner lots.
- Corner and freestanding pergola designs offer flexibility for different yard layouts, with freestanding options providing complete placement freedom while attached pergolas reduce material costs by half.
- Climbing vines like wisteria, clematis, and grapes transform a bare pergola into a living canopy that adds privacy, shade, and vertical planting opportunities.
- Material choices range from budget-friendly pressure-treated lumber ($8–$12 per post) to maintenance-free aluminum kits ($800–$1,200) and long-lasting cedar, allowing you to balance cost with durability.
- Multi-functional pergola designs earn their space by combining shade, seating, planters, lighting, and privacy screens in a single structure, turning modest yards into organized outdoor rooms.
Why a Pergola Is Perfect for Small Gardens
Pergolas create vertical interest without hogging horizontal real estate. Unlike gazebos or solid-roof pavilions, their open-rafter design keeps sight lines clear and prevents small yards from feeling boxed in.
They offer partial shade through slats or beams, which is ideal for plants that need filtered light and homeowners who want sun control without full coverage. Most pergolas can be built on 4×4 or 6×6 posts, keeping the footprint lean, often as compact as 6×6 feet or 8×10 feet for freestanding designs.
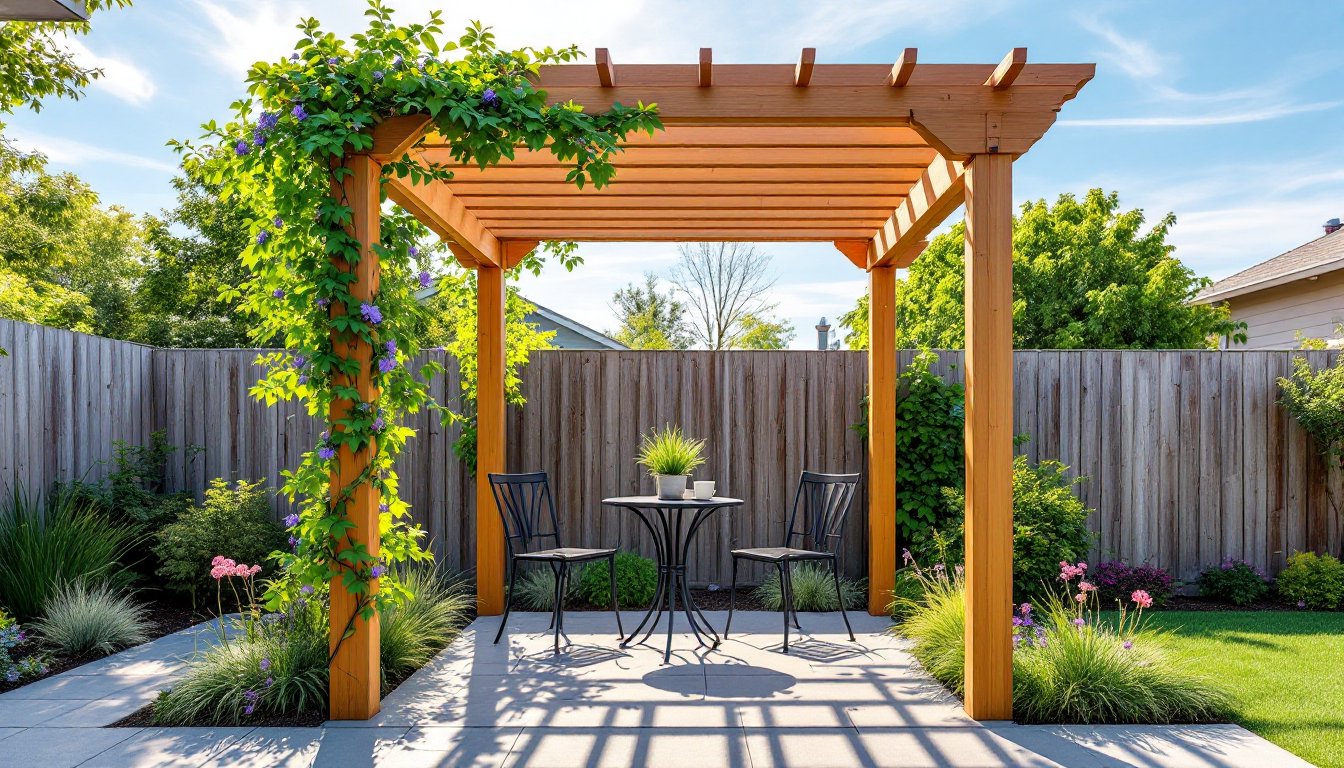
A pergola also acts as a ready-made trellis. Climbing vines like wisteria, clematis, or jasmine turn the structure into a living canopy, adding privacy and softening hard edges. For small gardens where every element needs to earn its keep, a pergola pulls double duty as architecture and planting support.
Finally, a well-placed pergola can define zones in a yard that lacks natural boundaries, separating a dining nook from a planting bed or framing a seating area without requiring fences or walls.
Compact Corner Pergola Designs
Corner pergolas make the most of awkward spaces that are too small for furniture but too visible to ignore. By anchoring the structure at a 90-degree angle where two fences or walls meet, you gain overhead coverage without surrendering valuable center-yard space.
A triangular or L-shaped footprint works well here. Use two posts along each adjoining side, say, 6 feet apart, and let the beams cantilever slightly beyond the posts for a bit of extra shade. Attach the pergola to existing fence posts (if they’re set in concrete and rated for lateral load) to eliminate one or two standalone posts.
Materials like pressure-treated 2×6 or 2×8 beams keep the build affordable and the structure light enough to avoid overloading fence framing. If your fence isn’t load-bearing, use L-brackets and Simpson Strong-Tie post bases to anchor independent 4×4 posts in concrete footings at least 12 inches deep, or deeper if your jurisdiction’s frost line requires it.
Corner designs shine when small rocks for ground cover are layered beneath, creating a low-maintenance zone that won’t compete with turf or require constant weeding. Add a small bistro set, string lights overhead, and you’ve carved out a micro-retreat.
Freestanding vs. Attached Pergolas for Limited Spaces
Freestanding pergolas offer flexibility, they can go anywhere in the yard and don’t require ledger board attachment to the house. This avoids flashing, siding penetration, and potential water intrusion issues. Freestanding builds typically need four posts, each set in concrete footings. For a compact 8×8-foot pergola, expect to dig 12-inch-diameter holes at least 24 inches deep (deeper in cold climates to reach below frost).
The trade-off? They consume a bit more ground space and require careful leveling to ensure the frame sits square. A freestanding unit works best when you want to highlight a garden bed, frame a fire pit, or create a destination separate from the house.
Attached pergolas (also called patio covers when partially enclosed) fix to the house on one side, cutting the post count in half and reducing material costs. You’ll fasten a ledger board, typically a 2×8 or 2×10, directly to wall studs or the rim joist, using lag screws and washers rated for outdoor use. Flashing above the ledger is non-negotiable to prevent water from wicking behind siding.
Attached designs feel more like an extension of indoor living and can shelter a doorway or a narrow deck. They’re especially smart for townhomes or row houses where yard access is limited to a rear patio. Just confirm your design aligns with outdoor space aesthetics if you’re aiming for a cohesive look from house to garden.
Either way, check local codes. Some jurisdictions classify attached pergolas as deck structures, which may trigger setback rules or require a building permit.
Creative Material Choices for Small Garden Pergolas
Pressure-treated pine remains the budget standard. It’s rot-resistant when rated for ground contact (look for the stamp), widely available in standard dimensions (remember: a nominal 4×4 is actually 3.5×3.5 inches), and takes stain or paint well after it dries. Cost runs roughly $8–$12 per 8-foot 4×4 post as of early 2026, though prices fluctuate with lumber markets.
Cedar and redwood offer natural rot resistance and richer color without chemical treatment. They’re lighter than pressure-treated lumber, making solo builds easier, but cost about double, closer to $18–$25 per post. They age to a silver-gray patina unless sealed annually with a UV-blocking finish.
Aluminum pergola kits have gained traction for small spaces. Pre-cut, powder-coated tubes and brackets speed up assembly and eliminate wood maintenance. They won’t warp, split, or need staining. Kits sized for 8×8 or 10×10 footprints start around $800–$1,200. The aesthetic skews modern, so they pair best with contemporary hardscaping and metal furniture.
Vinyl (PVC) pergolas mimic wood profiles but never require paint. They’re hollow, so structural capacity is lower, stick to decorative applications or light loads (no heavy planters overhead). Vinyl costs fall between treated lumber and cedar.
For a hybrid approach, use pressure-treated posts below grade and cedar or composite beams above. This saves money where it’s hidden and showcases nicer material at eye level. If you’re integrating flowering shrubs around the base, the contrast between natural wood grain and blooms enhances the garden’s layered look.
Vertical Integration: Combining Pergolas with Climbing Plants
A bare pergola is a missed opportunity. Training vines up posts and across rafters turns structure into living architecture and solves two problems: you get more shade, and you add vertical planting space without sacrificing precious ground.
Wisteria delivers dramatic cascades of purple or white blooms in spring, but it’s aggressive, expect to prune multiple times per season. It needs strong support: 6×6 posts and through-bolted 2×8 beams minimum, since mature vines can weigh hundreds of pounds.
Clematis is gentler and comes in dozens of varieties with different bloom times. It thrives on thinner supports like wire or twine strung between rafters. Plant roots want shade, so mulch heavily or use companion ground covers.
Climbing roses add color and fragrance but require annual pruning and disease management. They’re thorny, so keep them away from high-traffic edges. Use galvanized eye screws and coated wire to guide canes along beams.
Grape vines (if your climate supports them) offer edible rewards and dense summer shade. They’ll need annual winter pruning to control vigor and fruit production. A south- or west-facing pergola works best for heat accumulation.
Install supports during the build, retrofit is harder. Run stainless steel or vinyl-coated cable between posts using turnbuckles for tensioning, or screw in ladder-style trellis panels before you attach rafters. Space horizontal supports every 12–18 inches.
Keep vines at least 6 inches away from any ledger board attached to the house to reduce moisture retention and pest harborage. Trim growth annually to prevent tendrils from infiltrating soffits or siding gaps.
Multi-Functional Pergola Ideas for Small Yards
When space is tight, every structure should serve more than one role. A pergola can become a shade pavilion, a privacy screen, an outdoor room, and a storage solution, all in one footprint.
Add a retractable canopy or outdoor curtains on tracks to dial shade and privacy up or down. Sunbrella or similar solution-dyed acrylic fabric resists UV and mildew. Curtains on stainless-steel cable or ceiling-mount tracks let you close off one or two sides for wind protection without permanent walls.
Integrate built-in benches or planters along the perimeter. Frame them with the same lumber as your posts, 2×4 or 2×6 framing, topped with 2×10 or composite deck boards. Planters add vertical gardening tiers: benches provide seating without requiring separate furniture.
Incorporate lighting and electrical. Run 12-gauge UF-B (underground feeder) cable from a GFCI-protected outdoor outlet to a junction box mounted on a post. From there, you can power string lights, a ceiling fan, or even a small outdoor speaker. Conduit isn’t always required for UF-B burial, but check the National Electrical Code (NEC) and local amendments, some jurisdictions require PVC conduit even for direct-burial cable. Bury cables at least 12 inches deep (18 inches is safer and may be required in some areas).
Mount shade sails or polycarbonate panels between rafters for targeted rain and sun protection. Clear or bronze multiwall polycarbonate is lightweight, lets diffused light through, and sheds water. Fasten with gasketed screws and leave slight gaps for thermal expansion.
For yards that double as event space, a pergola becomes a natural anchor for decorations, privacy plantings, or temporary enclosures. Keep the design modular, use removable screens, clip-on planters, and hook-based accessories so the structure adapts season to season.
Conclusion
A small garden pergola isn’t just an accessory, it’s a high-impact framework that organizes space, supports greenery, and makes every square foot count. Whether you’re tucking one into a corner, attaching it to the house, or building freestanding, the key is proportionality and purpose. Choose materials that suit your climate and skill level, plan for plantings from day one, and don’t skip footings or flashing. With a weekend, basic carpentry tools, and a solid plan, you’ll turn a modest yard into a layered, livable retreat that punches well above its footprint.