
Choosing tile for a stand up shower isn’t just about aesthetics, it’s about function, durability, and creating a space that doesn’t turn into a maintenance headache. The wrong tile can trap water, crack in a few years, or become a grout-scrubbing nightmare. The right one can make a builder-grade bathroom feel custom. Whether someone’s tackling a full gut renovation or just refreshing an existing shower enclosure, tile selection sets the tone for the entire space. This guide walks through proven patterns, modern trends, and practical considerations to help homeowners land on a design that looks sharp and performs well.
Table of Contents
ToggleKey Takeaways
- Stand up shower tile choice affects waterproofing, durability, and long-term maintenance—porcelain is ideal for high-moisture areas, while natural stone requires regular sealing.
- Subway tile remains the most versatile and popular option, with layouts like running bond and stacked grid offering both visual interest and installation ease.
- Large-format tiles minimize grout lines and make small showers feel spacious, but they demand flatter substrates and professional-grade installation to prevent lippage.
- Proper substrate preparation with cement backer board or waterproof membranes like Schluter Kerdi is essential before any tile installation to prevent water damage.
- DIY tile projects succeed with careful planning—dry-lay patterns, use spacers and leveling systems, and invest in a wet saw for clean cuts; know when to hire professionals for waterproofing and structural changes.
- Bold accent walls and geometric patterns create statement designs, but restraint with two or three materials prevents visual chaos and keeps spaces cohesive.
Why Tile Choice Matters for Your Stand Up Shower
Tile isn’t just a backsplash, it’s the primary waterproofing layer in a shower. The material, size, and layout all affect how water drains, how grout holds up, and how easy the shower is to clean long-term.
Porcelain and ceramic tiles are the workhorses of shower installations. Porcelain is denser and less porous, making it better for high-moisture environments. Ceramic is more affordable and easier to cut, but it absorbs slightly more water. Both require proper substrate prep, cement backer board or a waterproof membrane like Schluter Kerdi, before installation.
Natural stone tiles (marble, slate, travertine) add texture and depth but come with trade-offs. They’re porous and require sealing every 6–12 months. Honed finishes show water spots less than polished ones. Avoid soft stones like limestone in high-traffic showers: they scratch and stain easily.
Glass tiles reflect light and make small showers feel larger. They’re nonporous and mold-resistant, but they show soap scum quickly. Use them as accent bands or feature walls, not full-coverage floors, they’re slippery when wet.
Grout choice matters as much as the tile. Epoxy grout resists staining and mildew better than standard cement grout, though it’s trickier to work with and costs more. For grout lines wider than 1/8 inch, sanded grout prevents cracking. Narrower joints need unsanded.
Slope and drainage affect tile performance, too. Shower floors must pitch at least 1/4 inch per foot toward the drain. Smaller tiles (like mosaics) on the floor create more grout lines, which help with traction but require more maintenance.
Classic and Timeless Tile Patterns
Some tile layouts never go out of style because they balance visual interest with ease of installation. These patterns work in traditional and transitional bathrooms without feeling dated.
Stacked grid layouts (tiles aligned in straight rows and columns) are the simplest to install and create a clean, modern look. They’re forgiving for first-time DIYers but can feel static in a small space.
Offset or brick-bond patterns stagger each row by half a tile, adding movement without complexity. This layout works especially well with rectangular tiles and hides slight imperfections in cutting or alignment.
Herringbone and chevron patterns use angled cuts to create a zigzag effect. Herringbone features rectangular tiles laid at 90-degree angles, while chevron requires mitered ends that meet in a point. Both demand precise measuring and are better suited for experienced installers. They add drama to an accent wall but can overwhelm a small shower if used everywhere.
Basketweave patterns alternate pairs of tiles in a woven look. They’re most common with smaller formats (2×4 or 3×6 inch tiles) and pair well with vintage or farmhouse aesthetics.
Subway Tile Layouts
Subway tile, the 3×6 inch rectangular workhorse, remains the most popular choice for stand up showers. Its versatility comes from how it’s laid, not just the tile itself.
Running bond (offset by half) is the default subway layout. It’s quick to install and visually elongates walls. Use vertical running bond to make low ceilings feel taller.
Stacked subway tile in a grid creates a modern, graphic look but shows lippage (uneven tile edges) more easily. It’s best with rectified tiles, which have sharp, uniform edges.
Vertical subway tile runs the long edge up and down instead of side to side. This layout adds height and works especially well in narrow shower stalls. It’s slightly trickier to install because vertical cuts are less forgiving.
Many spa-like bathroom designs pair white subway tile with dark grout for contrast. The inverse, dark tile with light grout, softens the look and hides hard water stains better.
Beveled subway tile adds a subtle shadow line along each edge, giving depth to monochromatic walls. Flat subway tile is easier to clean but can look flat under poor lighting.
Modern and Contemporary Tile Ideas
Contemporary showers lean toward clean lines, minimal grout, and unexpected textures. These trends prioritize low-maintenance surfaces and bold material choices.
Wood-look porcelain tile mimics the grain and texture of hardwood without the water damage. Planks typically come in 6×36 or 8×48 inch formats and install like traditional tile. Use them on walls or floors (with textured finishes for slip resistance). They pair well with matte black fixtures and concrete-look accent walls.
Hexagon tiles in large formats (8- or 10-inch widths) add geometric interest without looking busy. Matte white hex tiles with tight grout lines give a modern farmhouse vibe. Glossy or metallic hex tiles work in industrial or glam bathrooms. Avoid tiny penny tiles on shower walls, they’re grout-heavy and hard to keep clean.
Terrazzo tiles feature chips of marble, quartz, or glass embedded in a cement or resin base. They bring color and pattern without the fussiness of patterned ceramic. Terrazzo is durable and low-maintenance, but it’s heavy, check that the substrate can handle the load.
Concrete-look tiles offer the raw, minimalist aesthetic of poured concrete without the sealing hassles. Large-format versions (24×48 inches) create an almost seamless look with minimal grout lines. Pair them with warm wood tones or brass fixtures to soften the industrial edge.
Zellige tiles are handmade Moroccan tiles with irregular surfaces and rich glazes. Each tile is slightly different, creating a living, textured wall. They’re porous and require sealing, and the uneven surface makes them harder to clean than flat tiles. Best used as accent walls, not full showers.
Large Format Tiles for a Sleek Look
Large format tiles (12×24 inches and up) minimize grout lines and make small showers feel more spacious. They’re trending in contemporary design but come with installation challenges.
Tiles larger than 15 inches require flatter substrates and large-format thinset with stronger bonding agents. Any dips or humps in the wall show through as lippage. Use a longer trowel (1/2 inch notch) and back-butter each tile to ensure full coverage, voids lead to cracking.
Slab-style porcelain panels (up to 5×10 feet) can cover an entire shower wall with a single piece. They’re expensive and require professional installation, but the nearly grout-free look is dramatic. Make sure the framing can support the weight, these panels can exceed 100 pounds.
Rectified tiles have precision-cut edges that allow for grout lines as narrow as 1/16 inch. This creates a near-seamless look but demands perfect layout and leveling. Use leveling clips during installation to prevent lippage.
Large tiles work best on walls. For shower floors, stick with smaller formats (4×4 inches or mosaics) to maintain slope and traction.
Bold and Dramatic Shower Tile Designs
For homeowners ready to commit to a statement, these ideas push beyond neutral safety into memorable design territory.
Accent walls in contrasting tile anchor the shower without overwhelming the space. A marble slab feature wall behind the showerhead, flanked by simpler tile on the other three walls, creates a focal point. Alternatively, run a bold mosaic from floor to ceiling on one wall and keep the rest neutral.
Geometric patterns using cement tiles or patterned porcelain add color and movement. Moroccan, Spanish, and mid-century patterns work well in eclectic or maximalist bathrooms. Because the patterns are busy, limit them to the shower floor or a single wall. Cement tiles are porous and need sealing: porcelain versions offer the same look with less upkeep.
Metallic and iridescent tiles (copper, bronze, or pearlescent glass) catch light and shift color throughout the day. Use them sparingly as accent bands or niches. Full walls of metallic tile can feel overwhelming or dated quickly.
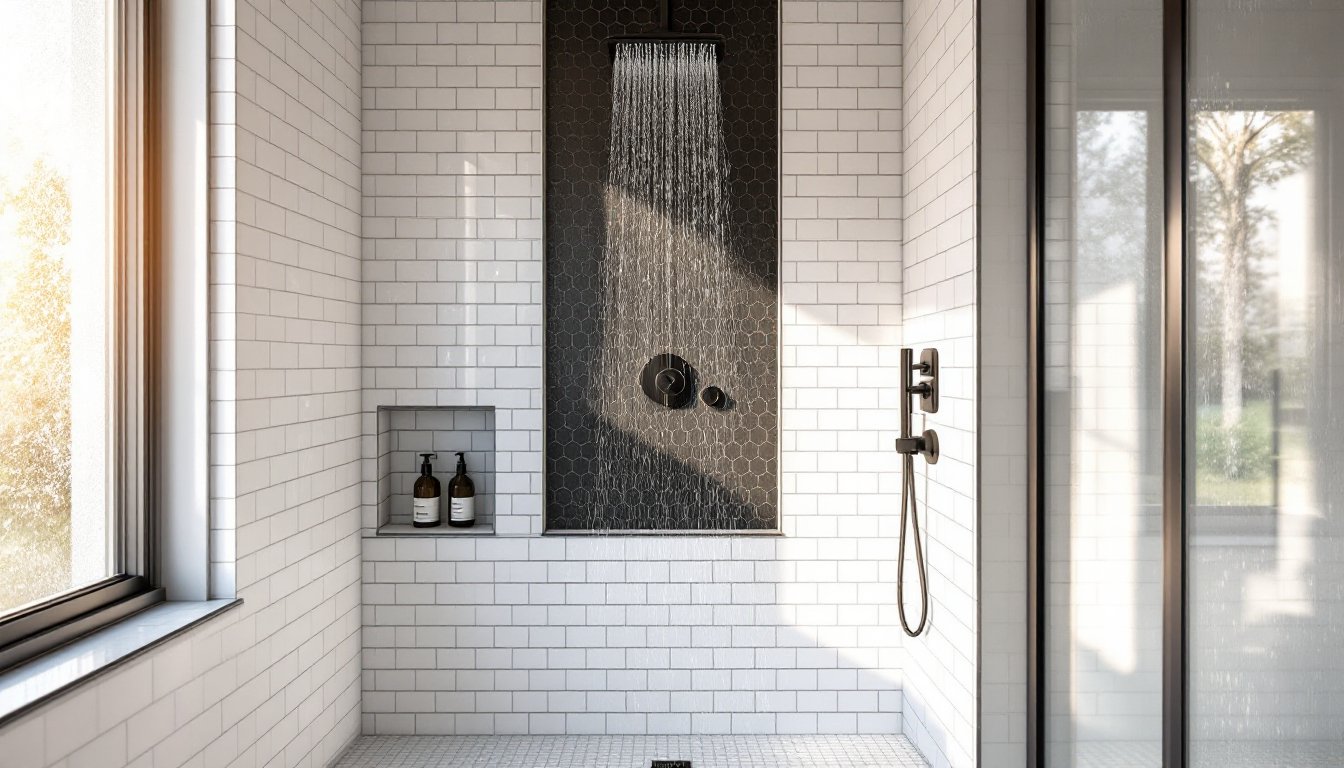
Black or charcoal tile creates a moody, modern shower but shows water spots and soap residue. Matte finishes hide buildup better than glossy. Pair dark tile with good lighting, recessed LEDs or a large window, to keep the space from feeling cave-like. Dark grout on dark tile hides stains and creates a seamless look.
Mixed materials and textures layer different tile types for depth. Combine smooth subway tile with rough stone mosaics, or pair glossy glass accents with matte porcelain. Limit the mix to two or three materials to avoid visual chaos. Homeowners exploring interior design inspiration often find that restraint makes bold choices feel intentional rather than chaotic.
Floor-to-ceiling tile in a single color or pattern makes a small shower feel taller and more cohesive. Carry the same tile onto the ceiling for a wet-room effect. This approach works especially well with large-format or slab tiles that reduce grout lines.
Practical Tile Considerations for DIY Installation
Tile selection should match skill level and available tools. Overreaching on a first project leads to costly do-overs.
Start with the substrate. Cement backer board (like Durock or HardieBacker) is the standard for shower walls. Install it over studs with corrosion-resistant screws every 8 inches. Seams get fiberglass mesh tape and thinset. For a belt-and-suspenders approach, apply a liquid waterproof membrane (RedGard, AquaDefense) over the backer board before tiling. Foam backer boards (like Schluter Kerdi-Board) combine substrate and waterproofing but cost more.
Measure twice, cut once. Dry-lay the tile pattern on the floor or against the wall before mixing any thinset. Start from the center and work outward to keep cuts symmetrical. Mark layout lines with a level and chalk line. Don’t start in a corner, chances are the walls aren’t perfectly square.
Use spacers and leveling systems. Spacers keep grout lines consistent (most showers use 1/8- or 3/16-inch spacing). Leveling clips prevent lippage on large tiles by holding adjacent edges flush while thinset cures. Many experienced tile installers still recommend checking projects on home renovation sites for troubleshooting tips.
Cut tiles with the right tool. A wet saw is the go-to for straight cuts in porcelain and ceramic. Rent one if this is a one-time project. For notches and L-cuts, use a tile nipper or an angle grinder with a diamond blade. A manual tile cutter works for ceramic but struggles with hard porcelain. For curved cuts around fixtures, a hole saw or diamond-grit hole saw attachment is essential.
Let thinset cure fully before grouting, at least 24 hours for walls, 48 for floors. Grouting too early can shift tiles or trap moisture. Remove spacers as you go, not after everything’s set.
Safety gear isn’t optional. Wear safety goggles (tile chips fly), a dust mask (cutting tile creates silica dust, which is a respiratory hazard), and knee pads (floor work is brutal). Wet saws throw water and grit everywhere, work outside or in a garage if possible.
Know when to call a pro. Structural changes (moving a drain, altering framing, adding a curb-less entry) often require permits and licensed plumbers or contractors. Waterproofing failures lead to mold and rot inside walls, if unsure about the membrane or slope, hire it out. Tile itself is DIY-friendly, but the systems underneath aren’t forgiving of mistakes.