A fire pit turns any backyard into a gathering spot, but without thoughtful landscaping, it’s just a circle of stone in the grass. The right design integrates the fire feature into the yard’s flow, balances hardscape with softscape, and creates a space people actually want to use after dark. Whether someone’s starting from scratch or retrofitting an existing patio, smart material choices and layout planning make the difference between a focal point and an afterthought. This guide walks through the decisions that matter, from choosing a style that fits the property to managing clearances and plant placement for safety and longevity.
Table of Contents
ToggleKey Takeaways
- Backyard fire pit ideas require thoughtful integration with landscaping, balancing hardscape and softscape to create a functional gathering space rather than an isolated feature.
- Wood-burning fire pits need 10–15 feet of overhead clearance and at least 10 feet of non-combustible hardscaping around them, while gas pits offer cleaner operation but require permitting and utility line installation.
- Seating should be arranged in a 60–80% arc at least 3–4 feet from the flame, with a total circle diameter of 12–16 feet for typical fire pits, using durable materials like teak or metal furniture.
- Fire-resistant landscaping materials include flagstone, concrete pavers, and crushed stone for the perimeter, with drought-tolerant plants like sedum, lavender, and rosemary planted at least 10 feet away from the fire ring.
- Layered lighting combining low-voltage path lights, accent lights, and string lights extends usability after dark while maintaining safety, and should use warm white LEDs (2700–3000K) to complement firelight.
- Critical safety measures include maintaining 25-foot distance from combustible storage, keeping a fire extinguisher and hose nearby, supervising fires at all times, and confirming local permits before construction begins.
Choosing the Right Fire Pit Style for Your Landscape
Fire pit selection comes down to three factors: permanence, fuel type, and how the feature interacts with existing grade and drainage. A built-in pit anchors a space visually and structurally, while a portable unit offers flexibility for renters or homeowners still tweaking their layout.
Fuel type dictates clearance requirements and ongoing costs. Wood-burning pits need at least 10–15 feet of overhead clearance (no tree canopy, pergola beams, or eaves). They produce ash, sparks, and smoke, which means positioning them downwind of seating and away from structures. Gas fire pits, whether natural gas or propane, burn cleaner, require less clearance, and turn on with a switch, but they demand a gas line trench (for NG) or tank storage (for LP). Gas also allows for more controlled flame height, which some jurisdictions require in high-density areas.
Permitting varies widely. Many municipalities classify a built-in, wood-burning fire pit as a permanent structure requiring a building permit and setback compliance (often 10–25 feet from property lines). Gas installations usually trigger a mechanical or plumbing permit due to fuel line work. Always check local fire codes before breaking ground.
Built-In vs. Portable Fire Pits
Built-in fire pits are typically constructed from concrete block, natural stone, or poured concrete with a steel fire ring insert. They can be round, square, or linear and often double as a landscape retaining wall or patio border. Because they’re mortared or stacked on a compacted gravel base, they handle freeze-thaw cycles better than loose pavers. Expect to excavate 6–8 inches for a gravel base, then lay 4–6 inches of compacted ¾-inch crushed stone topped with 2–3 inches of leveling sand if using block or stone veneer.
For patio integration, a built-in pit works well when set into or adjacent to an existing concrete slab or paver terrace. It creates a unified hardscape zone and simplifies furniture arrangement.
Portable fire pits include prefab steel bowls, cast-iron chimineas, and modular stone kits. They rest on non-combustible pads, concrete pavers, flagstone, or a poured slab, and can be moved seasonally or stored during wet months. They’re ideal for sloped yards where excavation isn’t practical or for testing a layout before committing to permanent construction. Most portable units sit on legs or a pedestal base, which means they need a level surface and a heat-resistant mat underneath to protect decking or pavers from radiant heat damage.
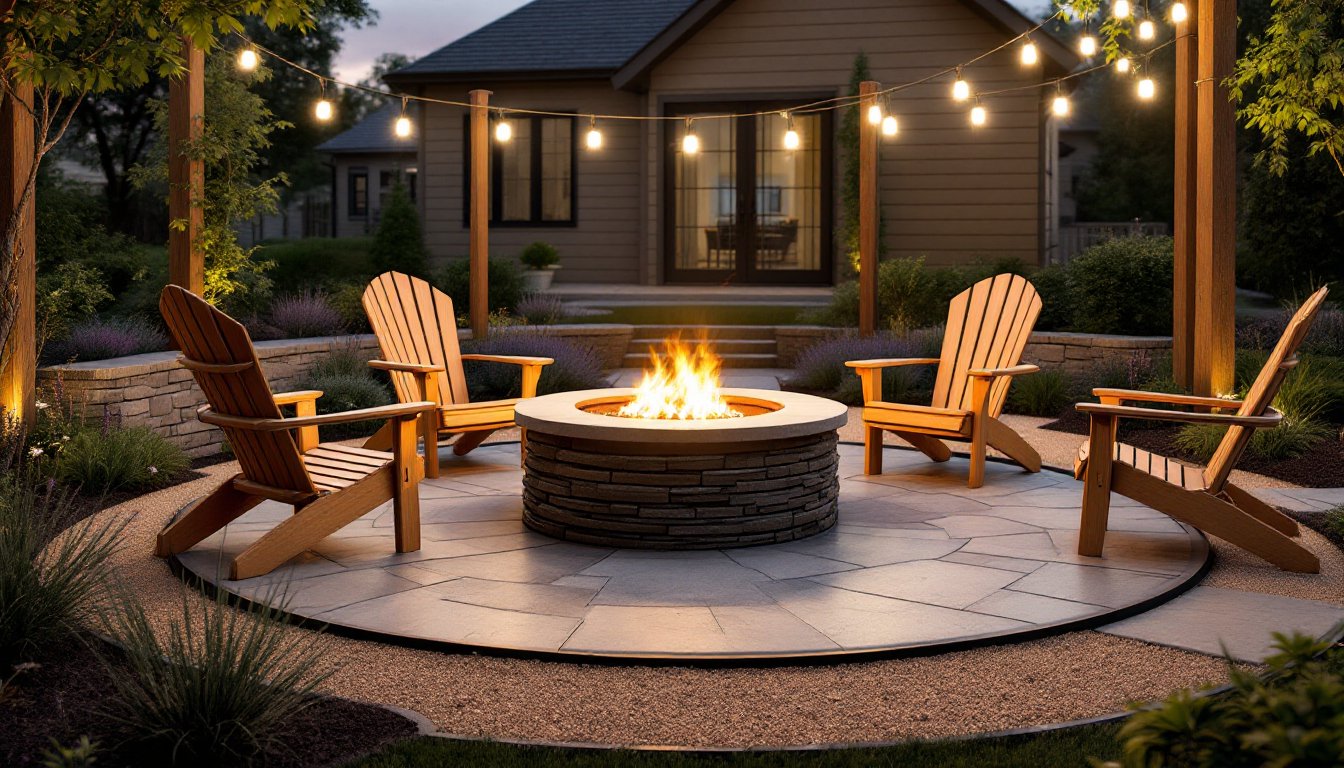
Creating a Fire Pit Seating Area
Seating layout determines whether a fire pit becomes a conversation hub or an awkward traffic obstacle. The most functional arrangements place seats in a 60–80% arc rather than a full circle, leaving an open pathway for access and airflow. This also prevents people from sitting directly in the smoke plume when wind shifts.
Distance from flame to seat edge should be 3–4 feet minimum for comfort and safety, with the overall seating circle diameter landing around 12–16 feet for a typical 36–48 inch fire pit. Use a garden hose or spray paint to mock up the layout before setting materials.
Built-in bench seating works well with retaining wall block or poured-concrete seat walls capped with bluestone, flagstone, or concrete cap block. Standard seat height is 16–18 inches, with a depth of 14–18 inches. These permanent seats frame the space and double as planters or storage if designed with hollow cores. They do require proper footing, pour a 4-inch concrete footing below frost depth in cold climates or set the first course on a compacted gravel base in temperate zones.
Movable furniture, Adirondack chairs, metal rockers, or teak benches, offers flexibility for group size and seasonal storage. Choose materials that handle moisture and UV exposure. Avoid synthetic wicker near fire pits: it can melt from radiant heat. Metal and hardwood hold up best, though both need periodic sealing or powder-coat touch-ups.
Surface underfoot matters for drainage and cleanliness. Decomposed granite (DG) compacts well, drains quickly, and stays cleaner than mulch, which can blow into the fire. Flagstone or concrete pavers set in sand provide a stable, non-combustible walking surface and pair well with low-maintenance landscaping strategies that reduce upkeep. For sloped sites, consider a low retaining wall to terrace the seating zone, using 6×6 or 8×8 timber, concrete block, or stacked stone with proper drainage behind the wall.
Landscaping Materials That Complement Your Fire Pit
Material selection ties the fire pit into the broader landscape while managing heat, drainage, and foot traffic. Non-combustible hardscaping, stone, concrete, gravel, or brick, should form a perimeter of at least 10–12 feet around the fire feature to contain sparks and prevent ground fires in dry conditions.
Crushed stone and pea gravel are budget-friendly, drain well, and create a defined border. Use ¾-inch crushed stone for high-traffic areas: it compacts tightly and resists displacement. Pea gravel (⅜-inch smooth river rock) works for decorative zones but shifts underfoot, so edge it with steel or aluminum landscape edging to prevent migration into planting beds.
Flagstone and natural stone add texture and a high-end look. Irregular flagstone (Pennsylvania bluestone, Tennessee crab orchard, or local fieldstone) can be dry-laid in sand for a rustic feel or mortared onto a concrete base for a polished finish. Thickness matters, use 1½ to 2-inch thick stone for foot traffic: anything thinner cracks under load. For a more uniform appearance, cut bluestone or limestone in 12×12, 12×24, or 24×24-inch modular sizes creates clean lines and pairs well with contemporary architecture.
Concrete pavers come in endless colors and textures, from tumbled cobblestone lookalikes to smooth, modern slabs. They’re dimensionally consistent, which simplifies layout and cuts installation time. Most residential pavers are 2⅜ inches thick and suitable for pedestrian traffic when laid on a compacted base of 4–6 inches of crushed stone and 1 inch of bedding sand. Polymeric sand in the joints resists weed growth and ant colonization.
Brick offers a traditional look and handles heat well, but use only firebrick or dense paving brick rated for outdoor use. Standard building brick absorbs water and spalls (flakes) during freeze-thaw cycles. Herringbone or basketweave patterns add visual interest and structural interlock, reducing shifting over time.
Many homeowners integrate small rocks and gravel to define zones, fill gaps between larger pavers, or create dry creek beds for drainage swales around the fire pit. This layered approach breaks up monotony and improves water management.
Adding Plants and Greenery Around Your Fire Pit
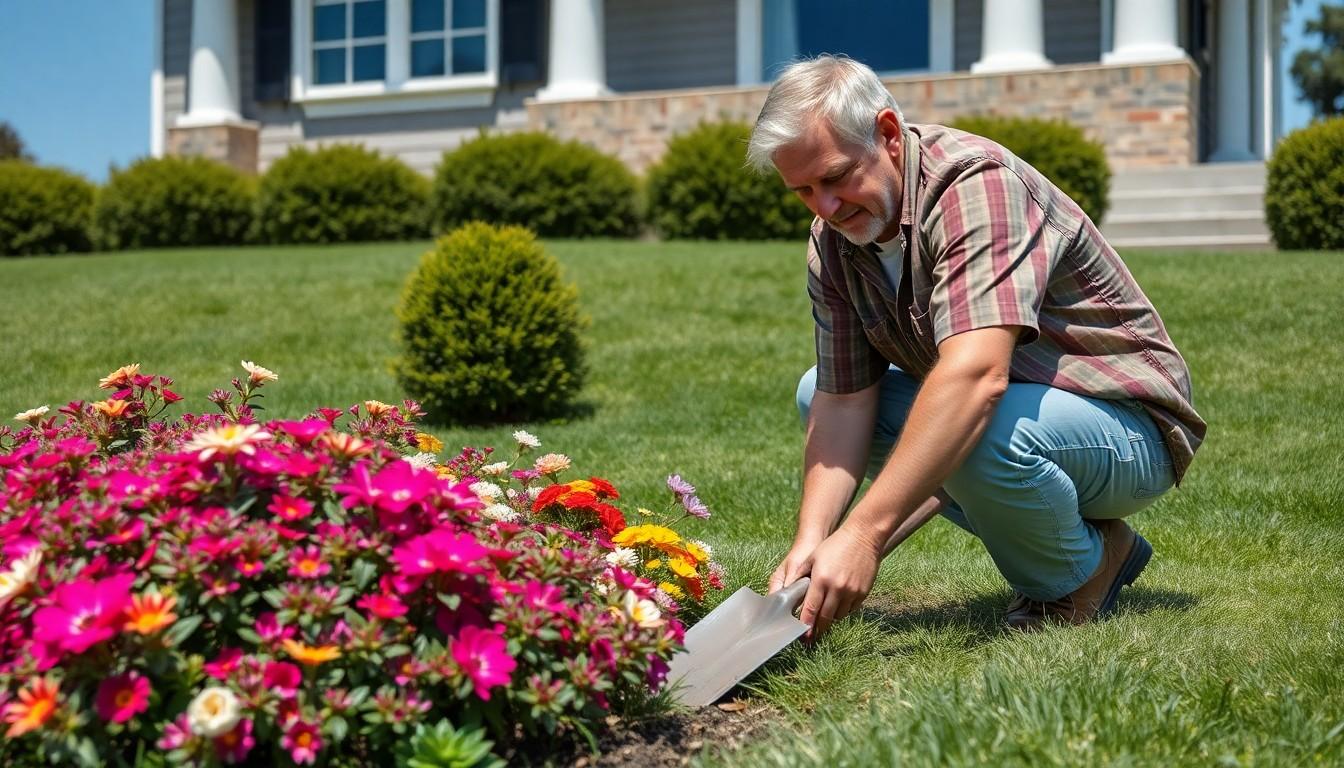
Planting around a fire pit requires balancing aesthetics with heat tolerance and fire safety. Keep all combustible vegetation, including ornamental grasses, shrubs, and trees, at least 10 feet from the fire ring. Within that buffer zone, use low-growing, fire-resistant groundcovers and hardscape.
Fire-resistant plant species include succulents (sedum, sempervivum), lavender, salvia, yarrow, and Mediterranean herbs like rosemary and thyme. These plants have high moisture content or aromatic oils that are less prone to ignition. Avoid highly flammable species like juniper, ornamental grasses (fountain grass, pampas grass), and conifers with resinous foliage.
Perimeter planting beds soften the hardscape and provide seasonal color. Use landscape fabric and mulch to suppress weeds, but swap out wood mulch for crushed stone, lava rock, or pea gravel within the 10-foot buffer to eliminate combustible material. Stone mulch also reflects heat and light, creating a brighter space after dark.
Raised planters built from the same materials as the fire pit (stacked stone, concrete block, or metal edging) create visual continuity and protect plant roots from compacted foot traffic. Fill planters with well-draining soil mix, 50% native soil, 30% compost, 20% coarse sand or perlite, to support drought-tolerant species.
Evergreen shrubs and small trees beyond the buffer zone provide year-round structure. Boxwood, holly, and dwarf conifers frame views without overwhelming the space. Deciduous trees like Japanese maple or serviceberry add seasonal interest and dappled shade during the day without dropping excessive leaf litter into the fire pit.
For inspiration on integrating greenery into broader outdoor layouts, landscape design principles emphasize balancing hardscape with softscape to create layered, functional zones. Similarly, design strategies for modern yards often use clean plant groupings and defined edges to complement architectural fire features.
Lighting and Ambiance for Evening Gatherings
Lighting extends usability and enhances safety around fire pits after dark. Layered lighting, combining task, accent, and ambient sources, creates depth without over-illuminating the space.
Path lighting marks walkways and steps leading to the fire pit. Use low-voltage LED fixtures (12V systems) with 3–5 watt bulbs spaced 6–8 feet apart along paths. Solar-powered stake lights work for low-traffic areas but lack the consistent output of wired systems. Run burial-rated cable (UF-B or direct-burial landscape wire) at least 6 inches deep in conduit to meet NEC requirements and protect against accidental shovel strikes.
Accent lighting highlights plantings, retaining walls, or architectural features. Up-lights (bullet or well lights) placed at the base of trees or shrubs cast dramatic shadows and draw the eye upward. Downlights mounted in pergola beams or tree canopies mimic moonlight and soften the space. Use warm white LEDs (2700–3000K) to complement firelight: cooler color temperatures feel clinical.
String lights and festoon bulbs add casual ambiance and work well over seating areas. Suspend them from posts, pergola beams, or tree branches using galvanized steel cable or UV-resistant cord. Choose commercial-grade strings with shatter-resistant bulbs and weatherproof sockets rated for outdoor use. Most run on 120V AC, so install a GFCI-protected outdoor outlet within 6 feet of the mounting point.
Fire features as light sources provide the primary glow, but supplemental lighting prevents trip hazards and makes it easier to cook or serve food. Dimmable fixtures or separate zones controlled by a low-voltage transformer allow homeowners to adjust brightness based on activity.
For comprehensive guidance on outdoor lighting design, including transformer sizing and fixture placement, the principles translate directly to fire pit zones. Many of the techniques used in front yard lighting schemes also apply to backyards, emphasizing balance between visibility and mood.
Safety Considerations and Practical Tips
Fire pit safety starts with site selection and material prep, then extends to operational habits and emergency readiness.
Clearances are non-negotiable. Maintain 10 feet minimum from structures (house, shed, fence), 15 feet from overhead obstructions (tree limbs, pergola beams, power lines), and 25 feet from combustible storage (firewood piles, propane tanks, mulch bags). In windy conditions, increase distances or skip the fire entirely. Embers can travel 50+ feet in gusts over 15 mph.
Non-combustible base and surround: Even portable fire pits need a heat-resistant pad, concrete pavers, firebrick, or a steel fire mat, underneath to prevent ground ignition or heat damage to decking. For built-in pits, line the interior with firebrick or refractory concrete rated to 2000°F+ to protect structural block from thermal shock and cracking.
Fuel storage and handling: Keep firewood stacked at least 25 feet away, covered, and elevated off the ground to prevent rot and insect colonization. Use only seasoned hardwood (oak, maple, ash) with moisture content below 20%: green or wet wood smokes excessively and produces creosote buildup in fire rings. For gas pits, secure propane tanks upright in a ventilated enclosure away from ignition sources, and check hoses annually for cracks or leaks using soapy water spray.
Fire suppression tools: Keep a garden hose, fire extinguisher (Class A or ABC, 10 lb minimum), and a bucket of sand or dirt within arm’s reach. Never use water on a grease fire (if cooking over the pit) or on hot glass fire media in gas pits, which can shatter. A spark screen or mesh cover reduces airborne embers and is often required by local ordinance.
Supervision and shutdown: Never leave a fire unattended, and ensure it’s fully extinguished before going to bed or leaving the property. Spread coals, douse with water, and stir until no steam rises. Touch ash with the back of a hand to confirm it’s cool (keep hand several inches above to avoid burns).
PPE and code compliance: Wear heat-resistant gloves when tending the fire, and keep long-handled tools (poker, tongs, shovel) on hand. Check with the local building department and fire marshal before construction: permits, inspections, and setback variances may apply. Some HOAs also restrict fire pit type, size, or fuel.
For additional project planning and material tips, side yard landscaping strategies often address similar drainage and clearance challenges, while resources like The Spruce offer detailed how-tos for hardscaping and outdoor safety.
A well-planned fire pit integrates seamlessly into the landscape, balances function with ambiance, and respects both safety margins and site conditions. With the right materials, thoughtful plant selection, and proper lighting, it becomes the anchor for years of evening gatherings, no filler, just firelight and conversation.