
A nightstand doesn’t need to come from a furniture store catalog. The best bedside companions often start as salvaged finds, scrap lumber, or unconventional pieces that do double duty. Whether the bedroom is short on square footage or just needs a style refresh, rethinking the nightstand opens up serious creative potential, and most of these ideas don’t require advanced carpentry skills. This guide walks through practical, buildable, and unexpected nightstand alternatives that actually work in real bedrooms, from weekend woodworking projects to clever repurposing hacks.
Table of Contents
ToggleKey Takeaways
- Unique nightstand ideas can be built from repurposed vintage finds like wooden crates, suitcases, and thrift store dressers, requiring only basic reinforcement and refinishing.
- DIY nightstands using standard lumber or plywood can be completed in one weekend for under $50, including floating shelves, plywood boxes, and industrial pipe-and-wood combos.
- Space-saving nightstand solutions like wall-mounted floating shelves and nesting tables work best in small bedrooms by eliminating floor clutter while maintaining functionality.
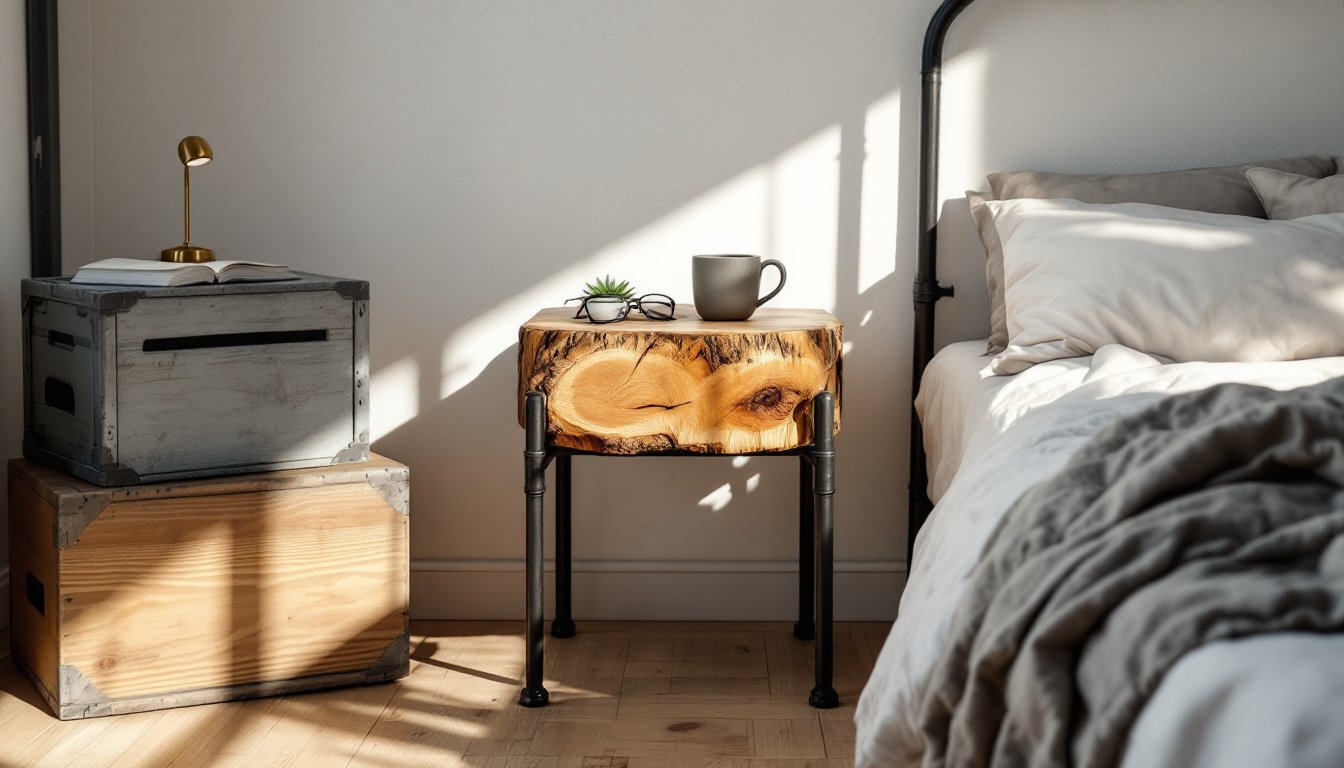
- Natural and rustic nightstand options such as tree stumps, live-edge slabs, and reclaimed barn wood bring organic warmth to farmhouse and boho-style bedrooms.
- Creative alternatives including ladders, bar carts, stacked books, and benches offer flexible bedside surfaces without requiring traditional furniture construction.
- Always inspect vintage wood for termite damage and ensure nightstands are stable and sized between 22–28 inches tall to align with standard mattress height.
Repurposed Furniture and Vintage Finds
Old furniture makes excellent nightstands, if it’s the right size and structurally sound. Look for pieces between 22 and 28 inches tall to align with standard mattress height (typically 25 inches from the floor for a queen).
Vintage wooden crates work well when reinforced and stacked. Check joints for loose nails and add wood glue plus 1¼-inch screws at corners. Stack two crates for height, securing them with L-brackets on the inside. Sand rough edges with 120-grit paper and finish with polyurethane or milk paint.
Old suitcases bring character but need a stable base. Attach four hairpin legs (available in 16- to 28-inch heights) directly through the suitcase bottom using washers and bolts. Pre-drill pilot holes to avoid cracking vintage leather or wood veneer.
Small dressers and filing cabinets from thrift stores often need only fresh paint and new hardware. Strip old finishes with citrus-based stripper if the surface is chipped, then prime with bonding primer (like Zinsser B-I-N) before topcoating. Swap dated pulls for modern knobs, most drawer hardware uses standard 3- or 3¾-inch center-to-center spacing.
Always inspect vintage wood for termite damage (small exit holes, frass dust) and metal pieces for rust that compromises structural integrity. Surface rust is fine: flaking metal that crumbles under pressure isn’t.
DIY Nightstands You Can Build This Weekend
Building a simple nightstand from scratch takes about four to six hours with basic tools. Many builders working on rustic bedside tables use standard dimensional lumber to keep costs under $50.
Three-board floating shelf nightstand: Cut one 1×12 board (actual dimensions 0.75 × 11.25 inches) to 18 inches long for the top. Cut two more to 12 inches for vertical supports. Attach supports to wall studs using 3-inch construction screws, spacing them 10 inches apart. Rest the top board across supports and secure with 1¼-inch screws from underneath. Add a French cleat on the back if wall anchoring into studs isn’t possible. Paint or stain before assembly for cleaner edges.
Plywood box nightstand: Cut ¾-inch plywood into four 16×24-inch panels (top, bottom, two sides). Use a circular saw with a straight edge guide for clean cuts. Assemble with wood glue and 1½-inch finish nails, or pocket hole screws (1¼-inch coarse thread) if using a Kreg Jig. Add a center divider shelf for stability. Edge-band exposed plywood edges with iron-on veneer tape to hide layers. This project works well with a miter saw for cleaner crosscuts, though a circular saw with a guide does the job.
Pipe and wood shelf combo: Pair a 1×10 or 1×12 board (cut to 20 inches) with ¾-inch black pipe flanges (four total). Screw flanges into the underside corners of the board, attach 12-inch pipe nipples, then add floor flanges at the bottom. The industrial look suits modern and loft-style bedrooms. Pre-drill pilot holes in the wood to prevent splitting, use a ⅛-inch bit for softwoods, 3/32-inch for hardwoods.
Always wear safety glasses when cutting lumber and a dust mask when sanding. Apply finish in a ventilated area.
Minimalist and Space-Saving Solutions
Bedrooms under 120 square feet benefit from nightstands that don’t dominate floor space. Small footprints don’t mean sacrificing function.
Wall-mounted floating shelves eliminate floor clutter. Use ½-inch or ¾-inch plywood cut to 10×14 inches or smaller. Install with concealed shelf brackets rated for at least 30 pounds. Locate studs with a finder: if studs don’t align, use toggle bolts rated for drywall (50-pound capacity per bolt). Mount shelves 24 to 26 inches from the mattress top for easy reach.
Ledge shelves (2 to 4 inches deep) work for minimalists who only need a phone, lamp, and water glass. These install with keyhole slots or sawtooth hangers and don’t require stud anchoring for light loads.
Nesting tables offer flexibility. Pull the smaller table out when needed, tuck it away when floor space is tight. Look for sets with at least a 16×16-inch top surface, anything smaller won’t hold a standard table lamp base (typically 6 to 8 inches in diameter).
Corner shelves (triangular or curved) make use of dead space. DIY versions can be cut from ¾-inch pine or plywood using a jigsaw. For a 90-degree corner, measure equal distances along each wall (12 to 15 inches), mark the diagonal, and cut. Sand edges smooth with 120-grit, then 220-grit paper. Attach with L-brackets into studs on both walls.
Keep nightstand depth under 12 inches in narrow bedrooms to maintain walkway clearance, building codes typically recommend 36-inch minimum pathways, though bedrooms aren’t always held to commercial egress standards.
Natural and Rustic Nightstand Options
Raw wood and organic materials bring warmth without polish. These work best in farmhouse, cabin, or boho-style bedrooms.
Tree stump tables are the easiest natural option, if you have access to logs. Use seasoned hardwood (oak, maple, walnut) that’s been dried at least six months to avoid cracking. Cut stumps to 18 to 24 inches tall with a chainsaw, then sand the top flat with a belt sander (60-grit, then 100-grit). Seal with polyurethane or tung oil to prevent sap bleed and insect intrusion. Attach four furniture glides to the bottom to protect floors.
Woven baskets (rattan, seagrass) turned upside down create casual side tables. Choose baskets at least 16 inches in diameter for stability. Top with a round wood or glass disc cut to size. Secure the top with industrial-strength adhesive felt pads or small angle brackets if the basket weave allows.
Reclaimed barn wood shelves pair well with pipe brackets or cable suspension. Clean salvaged wood with a wire brush to remove dirt, then check for embedded nails with a metal detector or magnet. Plane or sand boards flat if surfaces are uneven. Finish with clear matte sealer to preserve patina without adding shine.
Live-edge slabs bring organic shapes indoors. Look for slabs 18 to 24 inches long, 10 to 14 inches wide. Attach mid-century modern hairpin legs (available in 16- to 20-inch heights) or angled wooden legs. Pre-drill through the slab from the underside using a bit slightly smaller than the leg mounting screws. Apply epoxy resin to fill cracks or voids if the slab has spalting or bark inclusions.
Always inspect reclaimed wood for termites, carpenter ants, and powder post beetles before bringing it indoors. Heat-treat questionable pieces at 130°F for 24 hours or freeze for 72 hours.
Industrial and Modern Statement Pieces
Industrial nightstands lean on metal, concrete, and exposed hardware. These styles suit lofts, modern apartments, and urban interiors.
Concrete block and wood plank combos take ten minutes to assemble. Stack two 8×8×16-inch concrete blocks (actual size: 7.625×7.625×15.625 inches) and rest a 2×10 or 2×12 board across the top. Add a third block in the center for a bottom shelf. Paint blocks with concrete paint or sealer if raw gray doesn’t suit the space. The board can be stained, painted, or left raw. No fasteners needed, gravity does the work, but this setup isn’t ideal for homes with kids or pets that might topple it.
Metal storage cubes (wire grid or perforated steel) double as open-shelf nightstands. Look for cubes at least 14×14 inches. Stack two for height, securing them with zip ties through grid holes or small bolts if using perforated metal. These work well for displaying books, plants, or baskets.
Rolling carts (like Ikea Råskog or similar utility carts) offer mobility and multiple tiers. Most stand 20 to 30 inches tall, though taller models are available. Lock caster wheels if the floor isn’t level, unsecured carts will drift.
C-shaped side tables (metal frame with wood or glass top) slide under the bed edge, bringing the surface closer. These suit platform beds or low-profile frames. Check that the table’s vertical clearance matches bed height, most C-tables are designed for 24- to 28-inch clearance.
When working with metal, wear gloves to avoid sharp edges and use a metal file or deburring tool to smooth cut ends if customizing pieces.
Creative Alternatives to Traditional Nightstands
Not every bedside surface needs four legs and a drawer. Some of the most functional nightstands aren’t nightstands at all.
Ladders (wood or metal) lean against the wall and hold items on each rung. Choose ladders 5 to 6 feet tall with rung spacing around 10 to 12 inches. Secure the top to the wall with L-brackets to prevent tipping, important if kids or pets are in the home. Drape items over rungs or add S-hooks for hanging baskets.
Bar carts bring a hospitality vibe to the bedroom. Two-tier carts offer surface area for a lamp on top, books or a carafe below. Most bar carts have wheels, so position them on caster cups or rubber pads to prevent rolling.
Stacked books create height and surface area for free. Stack hardcovers spine-out in a column 20 to 24 inches tall, then top with a small tray or board. This isn’t stable enough for heavy lamps, use it for a phone, glasses, or a small plant. Avoid this option in humid climates where books warp.
Benches or stools at bedside height do double duty as seating. Choose pieces 18 to 24 inches tall with flat tops. Step stools (wood or metal) work surprisingly well, they’re stable, often have built-in storage, and cost under $30. Projects from beginner woodworking tutorials often include simple stool builds that adapt well to bedside use.
Chairs (side chairs, dining chairs, stools) can also function as nightstands if the seat height aligns. This works best with chairs that have solid seats, slatted or caned seats don’t hold items securely.
Consider the bed’s weight and placement before using lightweight alternatives. A nightstand that shifts when the mattress moves becomes a nuisance quickly.
Conclusion
A functional nightstand doesn’t require a furniture store trip or a week of woodworking. Most of these projects take a few hours and basic tools, skills developed through furniture building tutorials apply directly. The best nightstand is the one that fits the bedroom’s layout, matches how the space is actually used, and doesn’t sit half-finished in the garage. Start with one side of the bed, test it for a week, then build or source the second.