
The space beneath a deck often becomes a forgotten catch-all for lawn equipment, pool supplies, and random yard debris. But with the right door setup, that dim, underutilized cavity can transform into a functional storage zone, workshop nook, or even an enclosed utility room. Adding a door under a deck isn’t just about access, it’s about weather protection, security, and curb appeal. Whether dealing with a ground-level deck or one elevated several feet off the ground, choosing the right door style, material, and installation method makes the difference between a polished upgrade and a sagging eyesore.
Table of Contents
ToggleKey Takeaways
- Installing an under deck door protects stored items from weather and pests while providing security for valuable equipment like mowers, bikes, and grills.
- Hinged doors work best for openings 30–36 inches wide, while sliding barn doors are ideal when front clearance is tight or a modern-industrial aesthetic is desired.
- Pressure-treated lumber is a budget-friendly choice, but cedar, composite, or metal doors offer superior durability and weather resistance in harsh under-deck environments.
- Proper framing, flashing, and weatherstripping are essential to prevent under deck door leaks and sagging—skip shimming and sealing at your own peril.
- Design choices like matching the deck finish, adding decorative hardware, windows, or pathway lighting transform a functional door into a polished exterior feature.
- Check local building codes before installation, as some jurisdictions require permits for enclosed under-deck spaces, especially if electrical or plumbing work is planned.
Why Install a Door Under Your Deck?
Most decks sit on posts or piers, leaving a cavity that’s either open to the elements or framed in with lattice. Neither option offers secure, weatherproof access. Installing a proper door changes that dynamic.
Protection from weather and pests. An enclosed under-deck space with a door keeps rain, snow, and rodents out of stored items. This matters especially for power tools, outdoor cushions, or anything that degrades when exposed to moisture.
Security for valuables. Lawn mowers, bikes, and grills represent hundreds or thousands of dollars in equipment. A locked door beats flimsy lattice or an open gap every time.
Expanded usable square footage. Homeowners pay for the footprint their deck occupies. Enclosing and accessing that space effectively adds a storage room or workshop without breaking ground on a new structure.
Improved aesthetics. A well-built door with trim and paint integrates into the deck’s overall design, hiding clutter and giving the yard a finished look. Lattice panels can sag, fade, or develop gaps: a solid door eliminates those issues.
Before cutting any lumber, check local building codes. Some jurisdictions classify enclosed under-deck spaces as accessory structures and may require permits, especially if adding electrical wiring or plumbing. Load-bearing posts and beams must remain accessible and unobstructed per the International Residential Code (IRC).
Best Door Styles for Under Deck Spaces
The best door style depends on the available width, clearance in front of the deck, and how often someone needs to move large items in and out.
Traditional Hinged Doors
Hinged doors, single or double, are the most common choice for under-deck access. They swing open on butt hinges or strap hinges, offering a wide opening for wheelbarrows, mowers, or stacked storage bins.
Single hinged door. Works well for openings 30 to 36 inches wide. Frame it between two deck posts or install a header and king studs if the span is wider. Use exterior-grade hinges rated for the door’s weight: a solid wood door may require three hinges instead of two to prevent sagging.
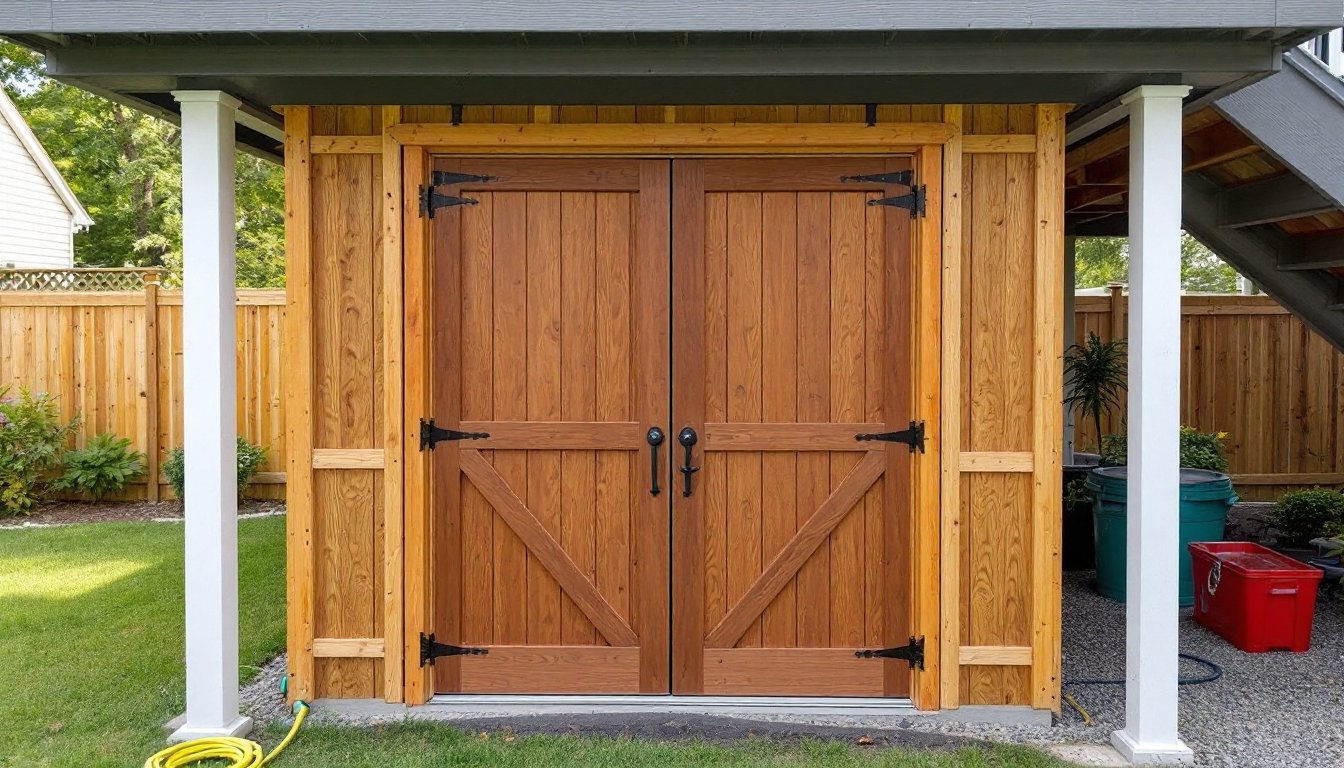
Double hinged doors. Ideal for openings 48 inches or wider. The double-door setup allows oversized equipment to pass through without tilting or disassembly. Coordinate the swing direction so both doors open outward, this prevents rainwater from pooling against the threshold and makes it easier to carry items in and out. For DIYers looking to build their own framed door, deck gate plans offer a simple starting point using dimensional lumber and basic joinery.
Latch and lock options. A barrel bolt on the inactive door (the one that stays closed most of the time) keeps both panels aligned. Add a keyed deadbolt or a heavy-duty padlock hasp for security. Avoid cheap screen door latches, they’re not built for frequent use or resistance to prying.
Sliding Barn Doors
Sliding barn doors have surged in popularity for under-deck installations, especially when clearance in front of the deck is tight or the aesthetic calls for a rustic or modern-industrial look.
Track and hardware requirements. Barn door hardware includes a top-mounted track, rollers, and a bottom guide to prevent swaying. The track mounts to a header board or directly to the deck framing, so verify the attachment points can support the door’s weight, typically 80 to 150 pounds for a solid wood or composite door. Use lag screws driven into the deck’s rim joist or blocking, not just the siding or sheathing.
Space considerations. The door slides parallel to the wall, so it needs clearance equal to its width. For a 36-inch-wide door, the track must extend at least 36 inches to one side of the opening. This works well when the under-deck area is long and narrow.
Weatherproofing challenges. Sliding doors don’t compress against a weatherstripped jamb the way hinged doors do, so they’re more prone to drafts and water infiltration. Add a drip cap above the door and consider a brush or rubber seal along the bottom edge to block wind-driven rain.
Alternative styles. Pocket doors (which slide into a cavity in the wall) and bifold doors are less common but can work in specific layouts. Both require more complex framing and are harder to weatherproof, so they’re better suited to covered or semi-enclosed deck areas.
Materials That Withstand the Elements
Under-deck doors live in a harsh environment: ground-level moisture, temperature swings, UV exposure, and, depending on the deck height, splashback from rain. Material choice determines how long the door lasts before warping, rotting, or delaminating.
Pressure-treated lumber. The budget-friendly workhorse. Use 0.40 or 0.60 pcf (pounds per cubic foot) retention for ground contact if the bottom of the door sits within 6 inches of soil. Frame the door with 2×4 or 2×6 pressure-treated boards, and clad it with 1×6 tongue-and-groove or 1×4 boards for a traditional board-and-batten look. Expect some initial checking and splitting as the wood dries: a coat of exterior stain or paint mitigates this.
Cedar or redwood. Naturally rot-resistant and dimensionally stable. These species cost more than pressure-treated pine but resist warping better and don’t require chemical treatment. They’re ideal for doors that will remain unfinished or receive only a clear sealant. Reapply sealant every 12 to 18 months to maintain color and water resistance.
Composite or PVC materials. Composite decking boards or PVC trim boards make excellent low-maintenance doors. They won’t rot, split, or absorb moisture, and they hold paint well. The trade-off is weight, composites are heavier than wood, and cost, often two to three times the price of pressure-treated lumber. Use stainless steel or coated screws: standard fasteners will corrode.
Metal doors. Steel or aluminum doors offer maximum security and durability. A pre-hung steel entry door designed for exterior use can be framed into an under-deck opening just like an interior doorway. Insulated models reduce temperature transfer if the space will be conditioned. Rust is the main concern: choose galvanized or powder-coated finishes and touch up any scratches immediately.
Hardware and fasteners. Whatever material is chosen for the door itself, all hardware, hinges, latches, screws, bolts, should be stainless steel or hot-dipped galvanized. Brass and bronze also resist corrosion but cost more. Standard zinc-plated screws will rust within a season in damp conditions. For detailed tutorials on working with various materials, Fix This Build That offers project plans and tool recommendations.
Installation Tips for Under Deck Doors
Installing an under-deck door starts with accurate framing and ends with careful shimming and sealing. Skipping steps here leads to doors that bind, leak, or sag.
1. Frame the rough opening. If the deck posts are already spaced conveniently, frame between them using 2×4 or 2×6 pressure-treated lumber for the header, jambs, and sill. If not, add king studs and a header to create the opening. The rough opening should be 2 inches wider and 2.5 inches taller than the door itself to allow room for the jambs, shims, and clearance.
2. Install blocking and flashing. Attach horizontal blocking between posts at the top and sides of the opening to provide solid nailing surfaces. Before setting the door, install a drip cap or Z-flashing above the opening to direct water away from the top of the jamb.
3. Set the door and shim plumb. For a pre-hung door, tip it into the opening and use shims behind the hinges and latch-side jamb to make the frame plumb and level. Check with a 4-foot level. For a site-built door, hang the jambs first, shim them square, then hang the door on the hinges.
4. Secure and seal. Drive 3-inch exterior screws through the jambs and shims into the framing. Don’t over-tighten, this can bow the jamb. Apply a continuous bead of polyurethane or silicone caulk around the exterior perimeter where the jamb meets the framing. Install weatherstripping on the hinge and latch sides, and add a door sweep or threshold seal at the bottom.
5. Trim and finish. Case the door with 1×4 or 1×6 PVC or wood trim to cover the gaps and give a clean edge. Miter the corners at 45 degrees for a traditional look or butt-join them for a simpler, craftsman style. Prime and paint or stain all exposed wood within 48 hours to lock out moisture.
Permit and inspection notes. If the door is part of a larger under-deck enclosure project that includes electrical outlets or lighting, an electrical permit and inspection are likely required per the National Electrical Code (NEC). GFCI-protected outlets are mandatory in damp or wet locations. Many comprehensive step-by-step DIY guides walk through framing, wiring, and finishing details for similar projects.
Creative Design Ideas to Maximize Curb Appeal
A functional door doesn’t have to look utilitarian. Small design choices elevate the finished project from “just access” to a cohesive part of the home’s exterior.
Match or contrast the deck finish. If the deck is stained a dark walnut, consider matching the door for a seamless look, or go with a crisp white or charcoal for intentional contrast. Painting the door the same color as the home’s trim ties the whole elevation together.
Add hardware with personality. Oversized strap hinges, a wrought-iron handle, or a rustic barn door pull turn a simple door into a focal point. Black or oil-rubbed bronze finishes work well with natural wood: brushed nickel or stainless suit modern homes.
Incorporate windows or vents. If the under-deck space will be used as a workshop or potting shed, add a small window for natural light and ventilation. A fixed or awning-style window set into the door or adjacent framing reduces the need for electric lighting during the day. Louvered vents near the top of the door help exhaust heat and humidity.
Use board-and-batten or shiplap cladding. These classic siding styles add texture and visual interest. Vertical boards make the door appear taller: horizontal boards echo the lines of the deck itself.
Install pathway lighting. Low-voltage LED path lights leading to the door improve safety and highlight the feature at night. Solar-powered options eliminate the need for wiring.
Consider a transom or sidelight. If the opening is wide enough, frame a fixed sidelight panel next to the door. This adds daylight to the interior space without sacrificing wall area for shelving or hooks.
The goal is to make the door feel deliberate, like it was part of the original deck plan, not an afterthought. Consistent materials, clean lines, and thoughtful hardware go a long way.